Wix Setup
Requirements
Using the Website Integration on a WIX site requires any paid or premium plan. The “Light” plan will work and is recommended by Goodshuffle Pro.
Overview
These are the high-level steps:
- Activate your Website Integration.
- Create a page for the basic gallery.
- Add Custom Elements to your site via the Wix Editor.
Walk-Through
Activation
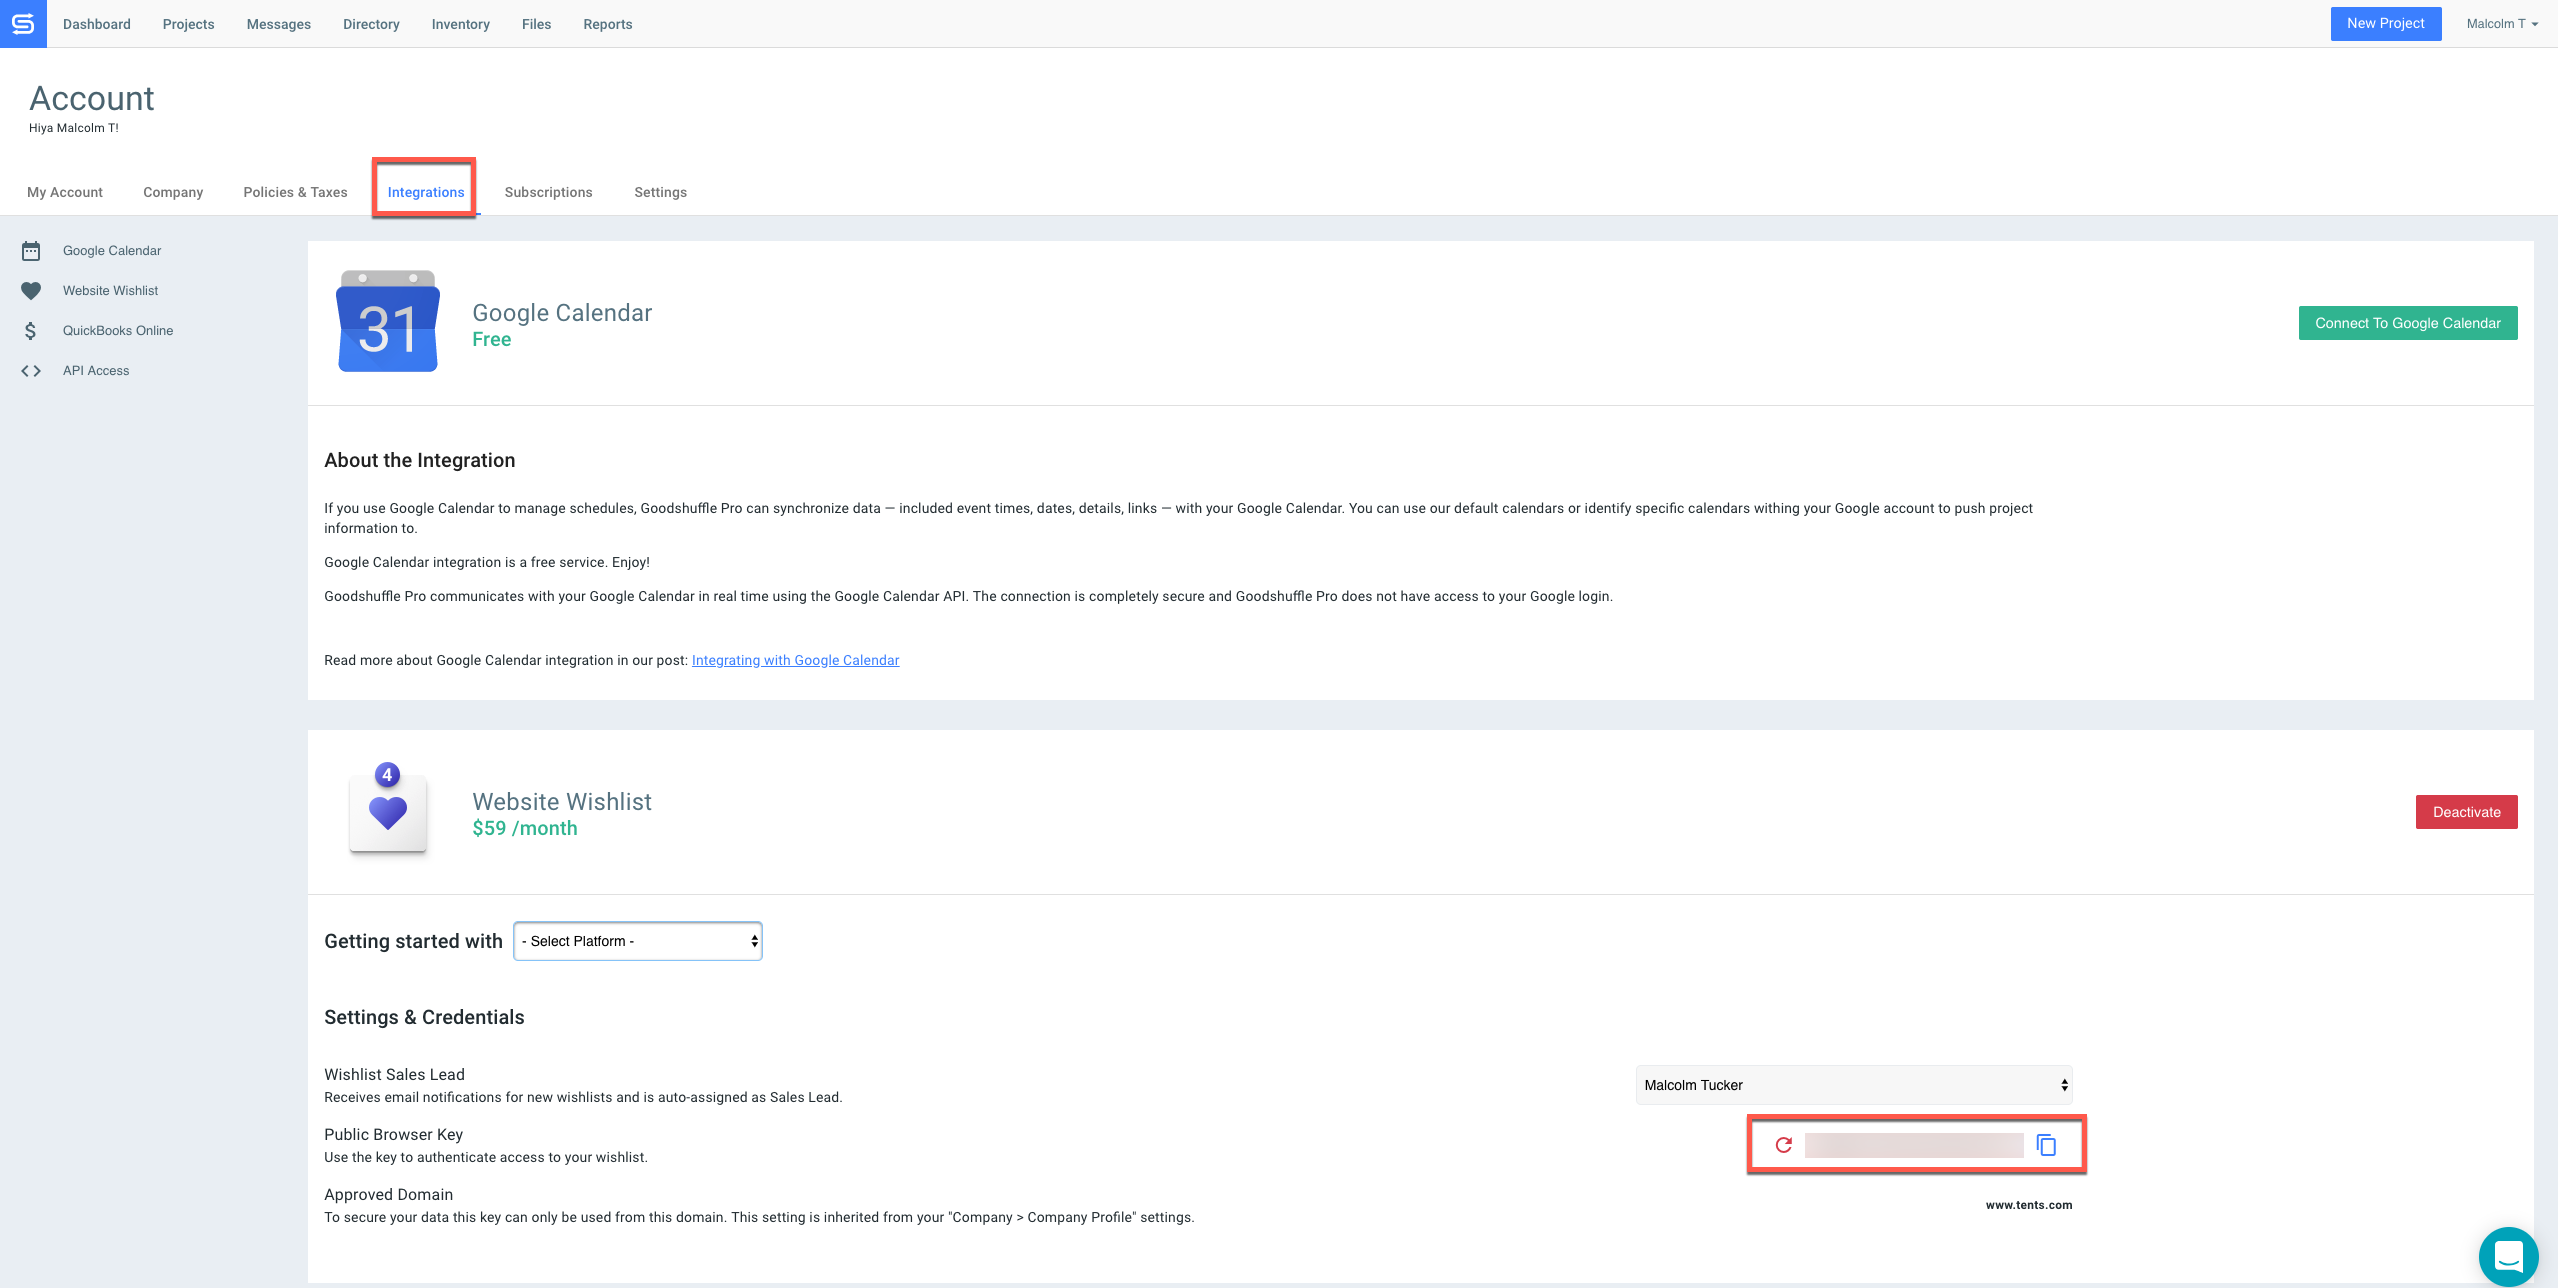
You can do this from the Integration Tab of your account. Copy the “Public Browser Key” on this screen for subsequent use.
Adding the correct code to the Header of your Wix site
To get started, first head to your Wix site editor. You can get there on most WIX sites by clicking “Home” and then clicking “Design Site” or “Edit Site”

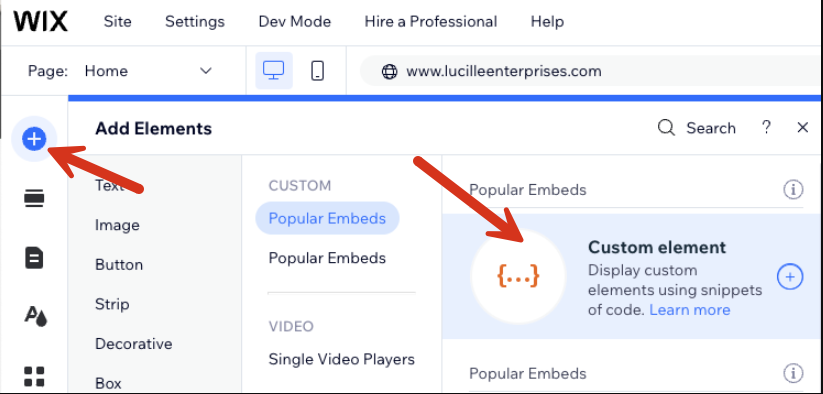
Now that we're in the right place, we need to set the Website Integration up in your site's header. You can do this by clicking " Add Elements” and then “Add Custom Element”
Now that you have this element added watch the video below to learn more about what you need to copy/paste:
For a detailed video of how to perform this step See Here
Custom Element Properties:
Source:
- Server URL:
https://unpkg.com/@goodshuffle/[email protected]/dist/custom-elements/index.js - Tag Name:
gspro-wishlist-config
Attributes (These are two separate Attributes):
First:
- Name:
data-url - Value:
https://data.goodshuffle.com/vendor/YOUR-PUBLIC-WEBSITE-KEY
Second:
- Name:
disable-body-scroll-lock - Value:
true
Note: Don't forget to get the Public Browser Key from your account in the Integrations Tab!
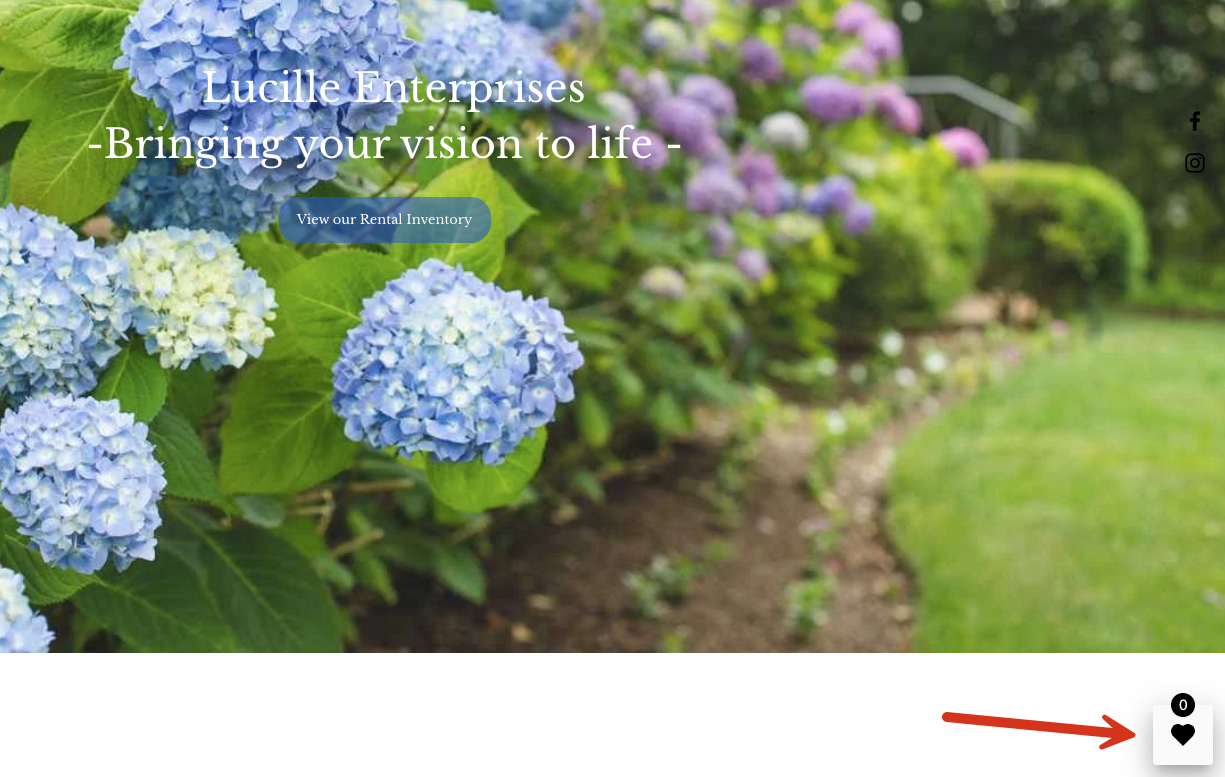
You'll know you have things connected correctly if, after clicking “Publish”, you see this icon on the front end of your site:
Listing inventory items
We've connected our inventory—great! Let's make it appear on a page with an Item Gallery and an Item List.
Wherever you'd like to list items, click “Add Element” and add a custom element,
From here, we'll adjust the Server URL and the tags again — learn more in this video.
Source:
- Server URL:
https://unpkg.com/@goodshuffle/[email protected]/dist/custom-elements/index.js - Tag Name:
gspro-item-galleryorgspro-item-list
Attributes (if using gspro-item-list):
- Name:
tagsorcategory(Note - this can change depending on what you'd like listed) - Value: a tag or category of your choosing.
Note: If you need help figuring out what value to provide for your desired category reference this doc.
All Set!
You should now have a basic page that displays a list of relevant categories/subcategories and your inventory.