WordPress Setup
Requirements
You will need…
- WordPress version 5 or better.
- An active “Website Integration” subscription on Goodshuffle Pro.
Overview
These are the high-level steps:
- Download the WordPress plugin.
- Activate your Website Integration.
- Upload the plugin to your site.
- Configure the plugin to use you public web key.
- Create a page to display a basic gallery.
If you prefer a narrated walk-through, checkout our WordPress Setup Youtube video.
Detailed Walk-Through
Activation
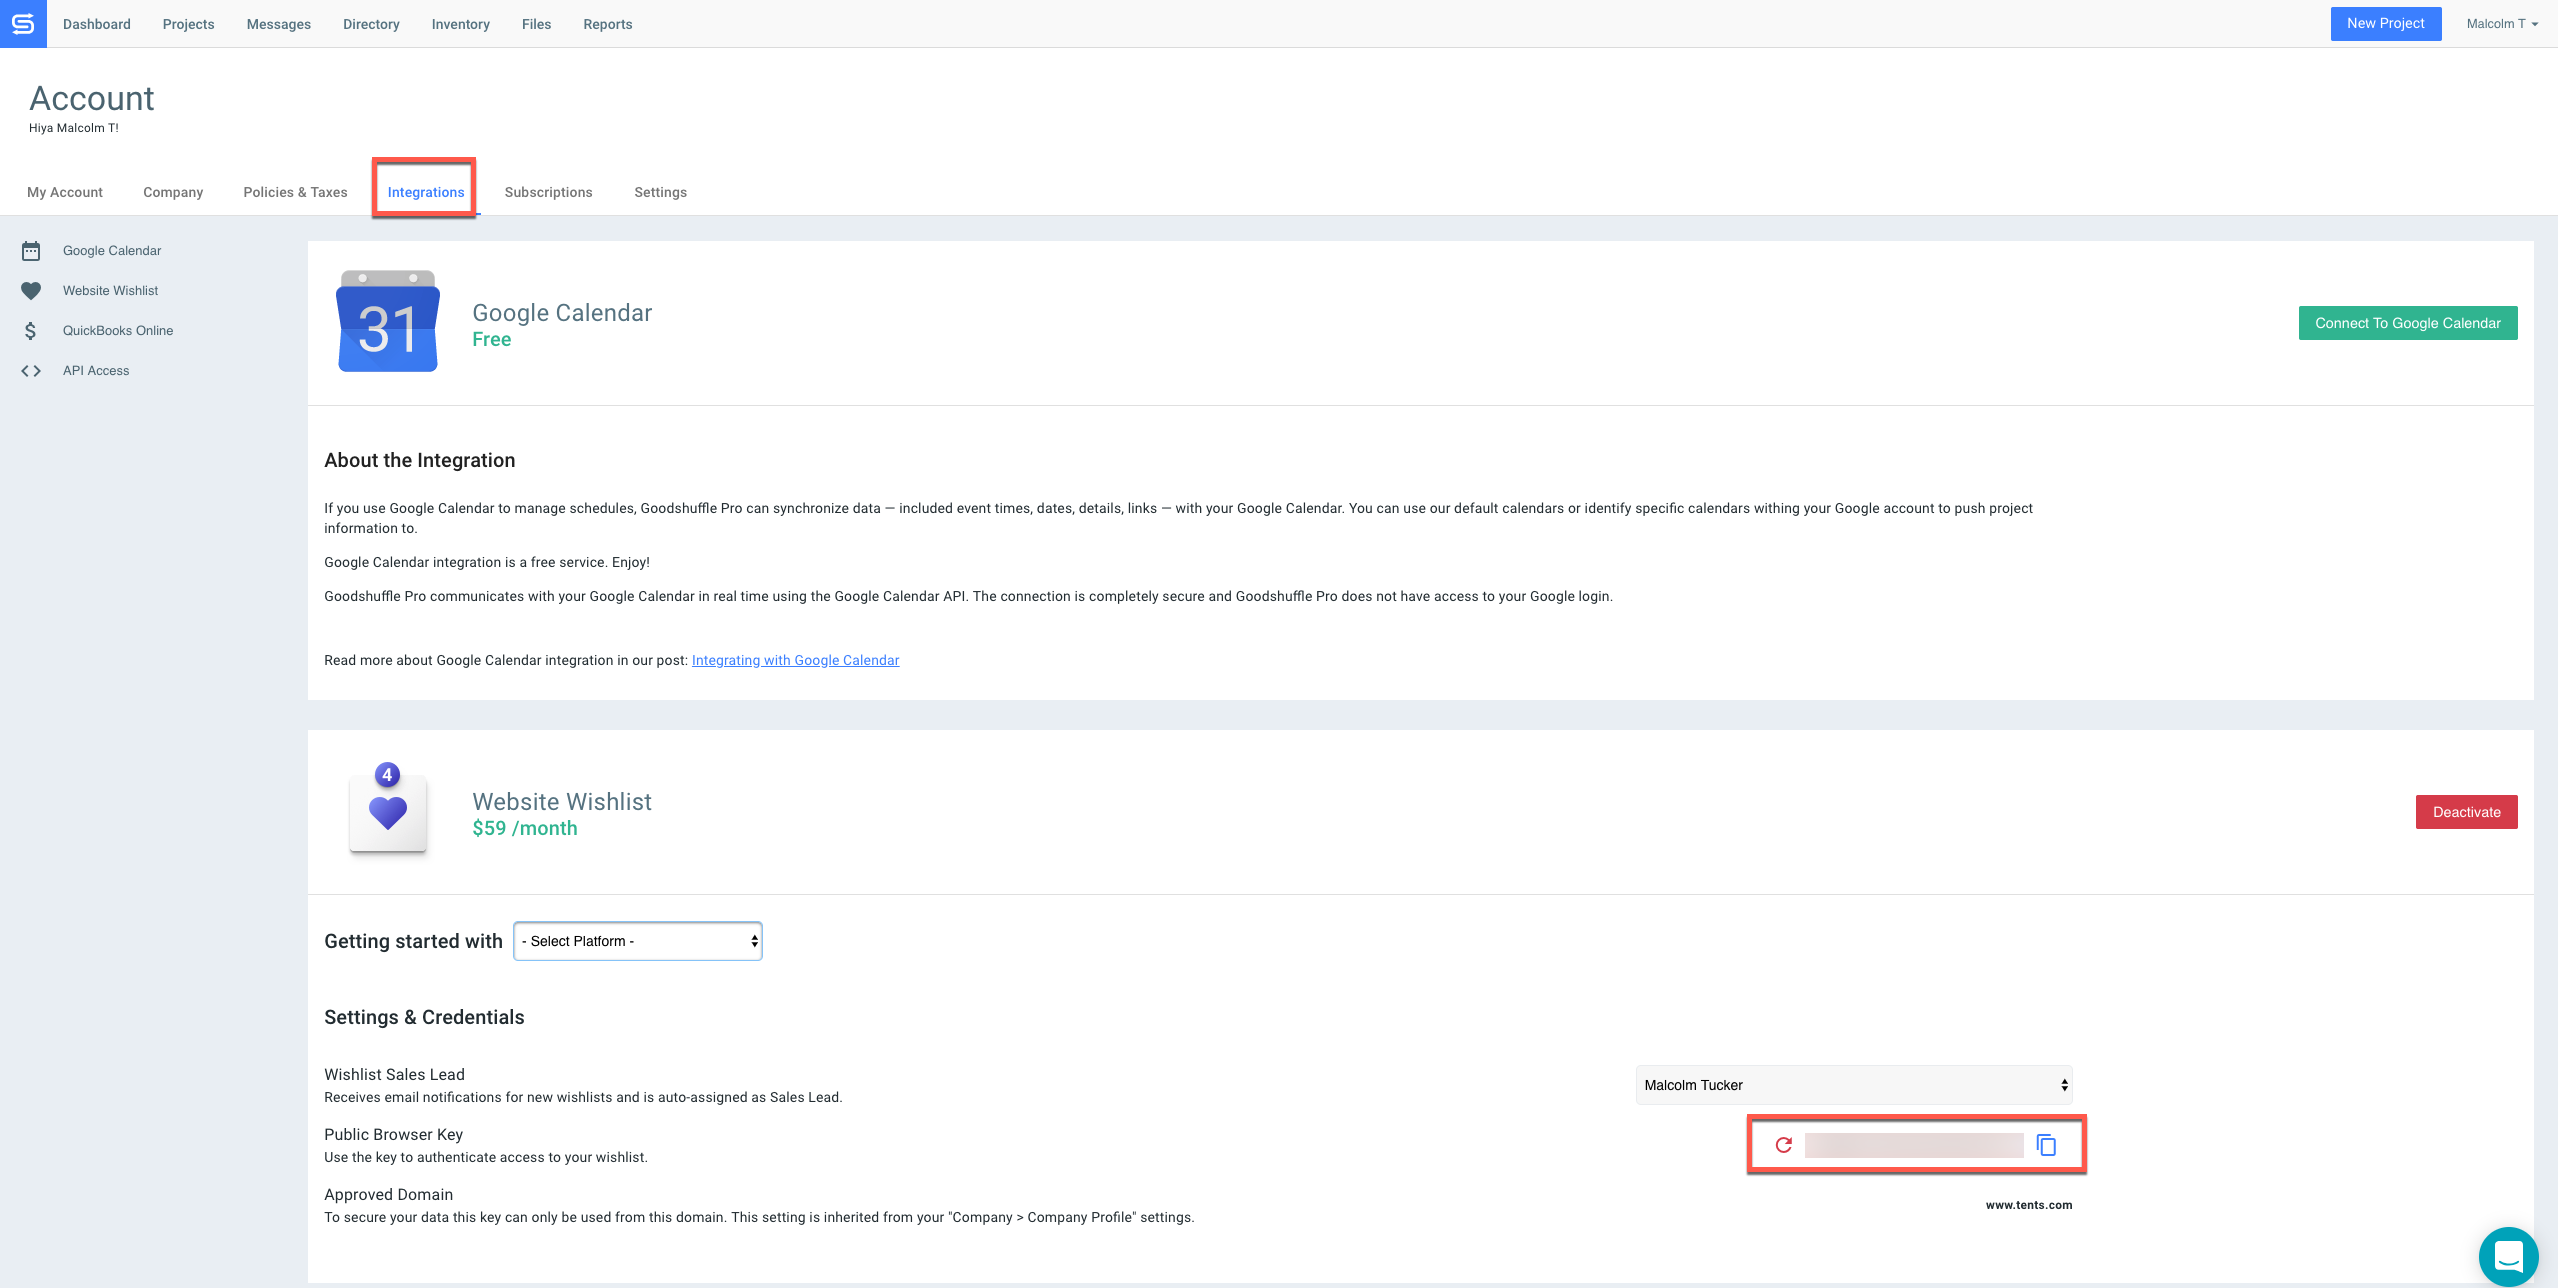
You can do this from the Integration Tab of your account. Copy the “Public Browser Key” on this screen for subsequent use.
Installation
- Sign into your WordPress site using an account that has administrative access.
- Select the “Plugins” item on the left sidebar.
- At the top of the main area, click the “Add New” button.
- At the top of the main area, click the “Upload Plugin” button.
- Click “Choose File” to locate and select the plugin you downloaded.
- Click “Install Now”.
- Click “Activate Plugin”.
You should now see “Goodshuffle Embedded Catalog” in your list of plugins.
Configuration
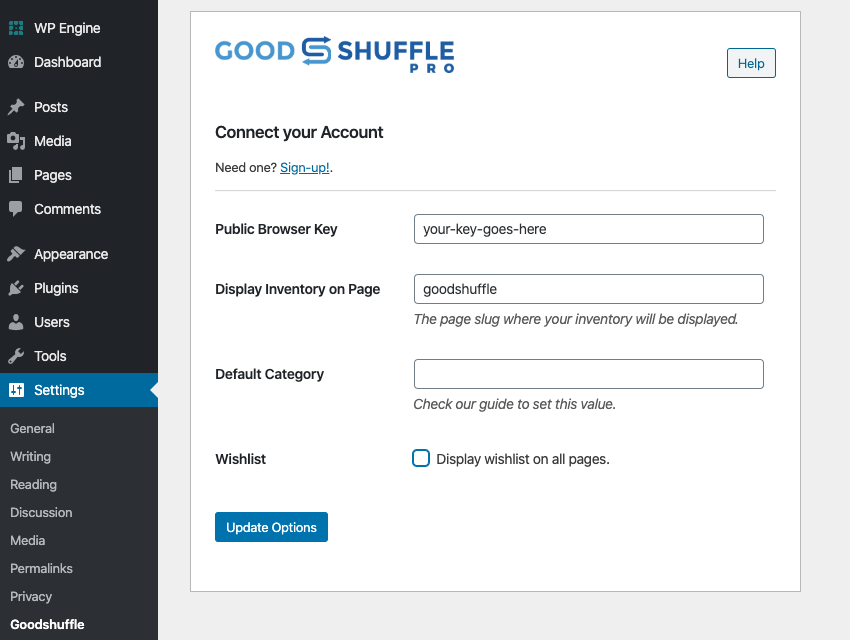
- Click the “Settings” link beneath “Goodshuffle Embedded Catalog”.
- Enter the “Web Key” that you obtained earlier.
- Set “Display Inventory on Page” with the slug of the page you want to display your inventory. Using the name “goodshuffle” is good for testing and evaluation purposes. You will be able to change it later.
- Leave the “Default Category” blank for now and check the box marked “Display wishlist on all pages”.
- Press the “Update Options” button to save your changes.
You should now be able to add a basic gallery to display your inventory.
Create a Basic Gallery
- Select the “Pages” item on the left sidebar.
- Click “Add New” to create a new page.
- Enter a title for the page (e.g. Goodshuffle)
- Click Publish in the top right.
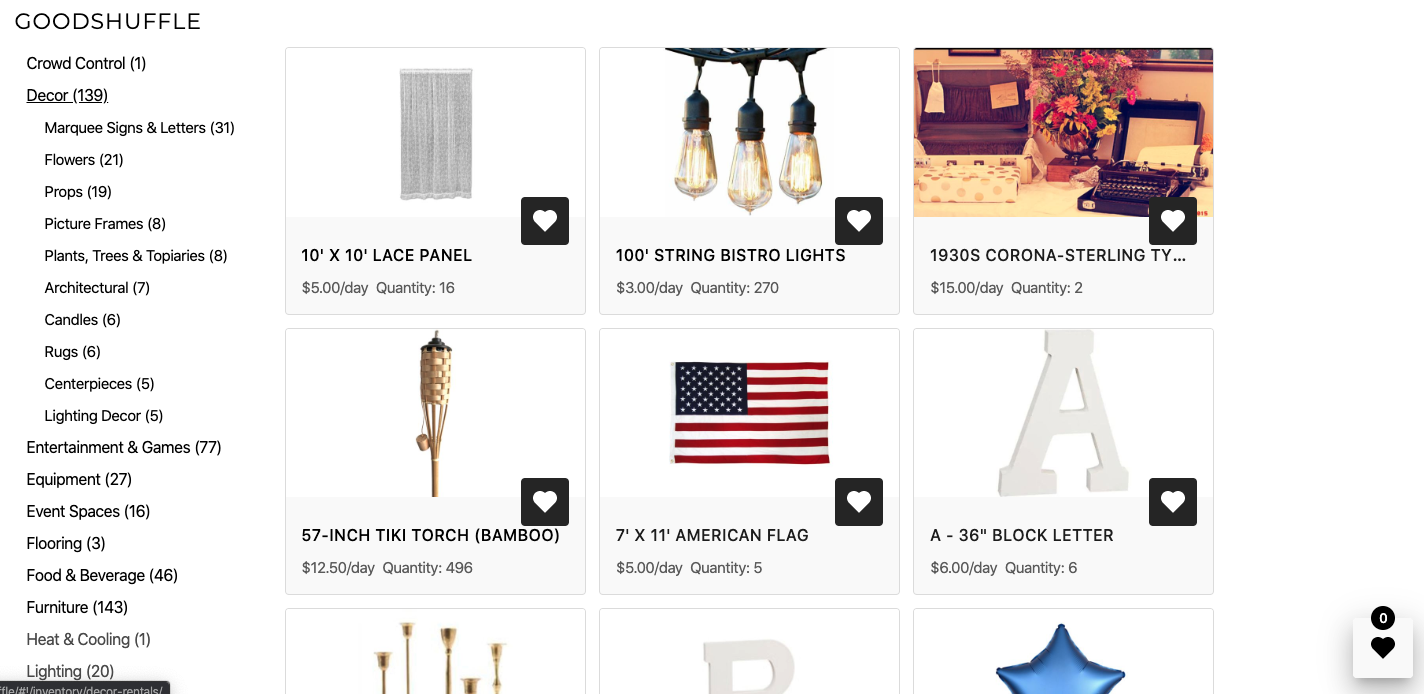
When you view that page, you should now see a basic gallery that includes category and subcategory filters.
Next Steps
- Apply your colors and typography to the web components.
- Learn how to use the
<gspro-item-list>to create customized lists of your items.